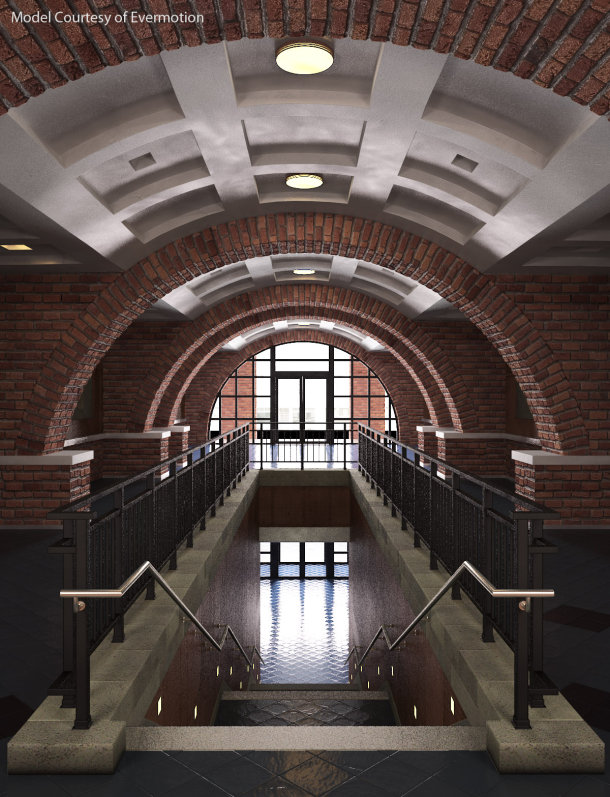
Chaos Group’s plug-in renderer is already an industry standard for architectural vizualisation, and has recently made inroads into VFX. Jason Lewis puts version 2.0 of the 3ds Max edition through its paces to assess what impact new materials, stereo tools and the V-Ray RT GPU-accelerated preview renderer will have in production
Today’s CG industry is a vast landscape of ideas, processes, and procedures, and the tools used to realise artists’ visions are almost as diverse as the artists themselves. However, most projects follow a standard workflow, from asset creation through to post-production. Today, we are going to be looking at one particular tool used during the penultimate step in that process: rendering.
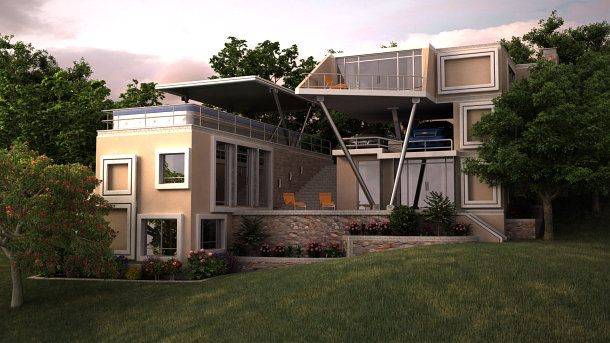
V-Ray has been one of the most popular third-party rendering solutions available for quite some time. It dominates the field of architectural visualization, and has recently found its way into effects for television commercials and feature films, one of the most recent examples being the environments for Tron: Legacy, where it was used alongside mental ray and RenderMan.
The Chaos Group, V-Ray’s creator, produces versions for 3ds Max, Maya, Rhino and SketchUp. A Cinema 4D edition is also available from a separate developer. However, in this review, we will focus solely on V-Ray for 3ds Max. Before we get into the new features in version 2.0, the latest release, I want to look at the software as a whole. Those of you who are familiar with version 1.5 may wish to skip ahead.
V-Ray: the fundamentals
V-Ray has been a 3ds Max plug-in since its inception, and is tightly integrated into its host software. It supports raytracing and global illumination based on the Monte Carlo sampling technique, and offers quite an extensive feature set, including displacement mapping, area lights, image-based lighting and IES photometric lights; several custom shaders, including car paint and subsurface scattering; and a physical camera that supports depth of field and 3D motion blur. You can find a full list of features on the Chaos Group website.
Speed-wise, V-Ray isn’t the fastest renderer out there, but nor is it the slowest. Instead, it falls right in the middle, with renderers based on the Reyes architecture like RenderMan on the faster side, and unbiased renderers like Maxwell Render and fryrender on the slower side.
Seamless integration
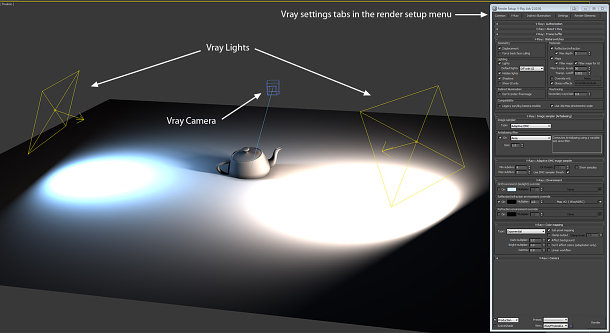
V-Ray integrates itself with 3ds Max seamlessly, with all the rendering parameters contained within Max’s Render Setup dialog. V-Ray-specific maps, materials and shaders can be accessed via the Material Editor in both classic and Slate modes, and V-Ray lights, cameras and objects are all found in their respective tabs within the Create portion of the command panel. V-Ray-specific lights and other objects have unique icons within the viewports, enabling you to distinguish them quickly from Max’s native tools, or those of other plug-ins.
This integration is one of my favorite things about V-Ray. While the alternative approach – to use a plug-in to export to a standalone application, as Maxwell Render and fryrender do – is more flexible, I personally prefer to have my entire rendering workflow remain within a single application. To some extent, this comes down to personal taste, but not having to jump back and forward forth keeps my workflow simple, clean and quick.
The Render Setup dialog is where you select V-Ray as your render engine, and where you will then find all of the main controls. The V-Ray tab holds the global switches, the controls for image sampling and color mapping, the environment lighting/reflection/refraction overrides, the camera controls, and the V-Ray frame buffer settings. The Indirect Ilumination tab holds the settings for global illumination and caustics; the Settings tab controls the under-the-hood settings (I never mess with any of these, with the exception of increasing Dynamic memory limit from the default 400MB to 10-13GB); while the Render Elements tab is self-explanatory, controlling the render passes you are generating.
Next, let’s take a quick look at V-Ray’s custom shaders. While V-Ray will render any of the Max default materials, with the exception of some of the mental ray shaders, it is recommended that you use the V-Ray-specific materials as they are extremely powerful.
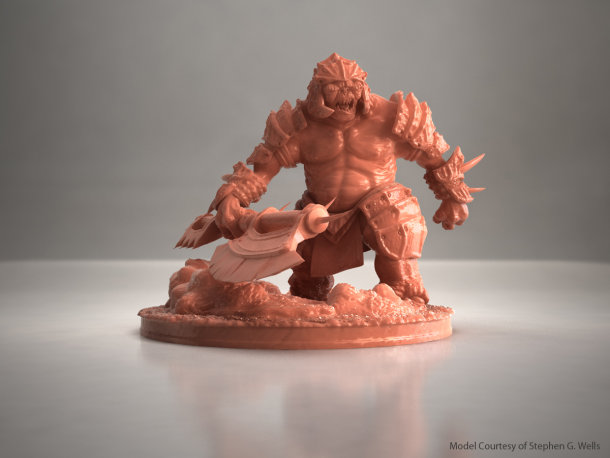
The basic V-Ray material is similar to the mental ray Arch & Design material, and can be used to simulate a wide variety of surfaces, while the light material is used to make objects self-illuminated or turn them into actual light sources. There are two different subsurface scattering materials that can be used to mimic the look of skin, wax or opaque liquids; a car paint material that I will go over in more detail later since it is new in version 2.0; and VRay2SidedMtl, a two-sided material that is great for rendering translucent objects.
There is also VrayBlendMtl, which is similar to Max’s Shellac material, except that you can blend up to 10 materials (one base and nine coat materials) instead of Shellac’s one base and one coat material – you can adjust the blending for each of the nine coat materials independently of one other – and several other V-Ray shaders geared towards more technical operations.
In addition to the custom shaders, V-Ray also includes several procedural maps that can be loaded into any map slot of any material that V-Ray can render. These include VRayHDRI, V-Ray’s custom HDR image loader; VrayDirt, a procedural map that adds color to the corners and edges of an object based on its surface curvature; VrayCompTex, a map that enables you to composite two different images together to form one map; and VrayDistanceTex, a new map in version 2.0, and one I shall look at in detail later.
V-Ray also has its own custom lights and camera, and while it will render using Max’s defaults, it is highly recommended that you use the custom versions as they are tailored to work with the V-Ray render core, and offer a vast level of control. Lights can be set to rectangular area lights, spherical lights, dome lights and mesh-based lights. The V-Ray physical camera offers full angle and focal length controls, exposure control, vignetting, white balance and all the rest of the controls you would expect to find in a real-life camera.
Before we come to the new features in version 2.0, a note on hardware. For this review, all of my testing was done on an HP Z800 workstation sporting a pair of Intel Xeon X5680 six-core CPUs running at 3.33GHz. (You can read my review of the Z-series workstations here.)
However, like most modern rendering engines, V-Ray is fully multi-threaded, and therefore likes lots of CPU cores. In fact, the program scales almost linearly with the addition of every CPU core up to its limit of 32. (A few comparative speed tests on a machine equipped with a single 3.33GHz Core i7-980X processor – the desktop equivalent of the X5650 – confirmed the near-linear scaling of performance from six to twelve CPU cores.)
If you can’t afford a 12-core system, I would personally recommend at least a quad-core system. If it comes down to a higher-frequency chip with less cores or a lower-frequency chip with more cores, go with more cores: you will get a much higher bump in performance than you will with a couple of hundred extra MHz in clock speed.
New features in version 2.0
So what’s actually new in version 2.0? Although there have been some tweaks to the rendering core, most of these are subtle. The most notable are the changes to the Adaptive DMC Image sampler that allow it to properly calculate sampling points in dark areas when gamma correction is used. This effectively reduces noise in the darker areas of the rendered image.
However, most of the changes in V-Ray 2.0 are actual new features. The new car paint material takes the tedious process of creating metallic paint shaders (prior to this, usually created by combining multiple standard materials inside a VrayBlendMtl) and greatly simplifies it, giving the user easy-to-use controls that produce, in my opinion, quite good results.
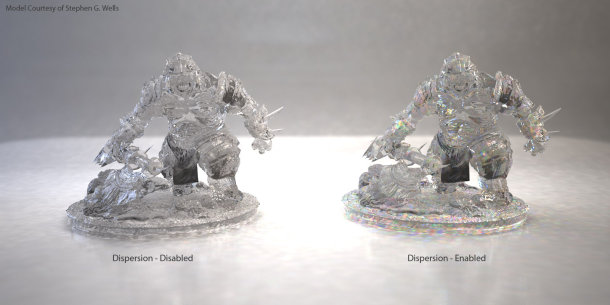
Also of note here is that the standard VRayMtl now has a Dispersion checkbox in the Refraction properties that, when checked, makes the raytracer calculate proper dispersion for refractive objects. It’s a small addition, but it adds a nice level of realism to transparent objects like glass.
There are also several new procedural maps that can be used with any material that V-Ray can render. The first of these is the MultiSubTex texture. This works in much the same way as Max’s Multi/Sub-Object material, enabling you to assign multiple textures to an object’s faces according to their material ID, or different textures to different objects according to their object ID. This is useful if your scene requires a lot of variation between surfaces, but you don’t want to clutter your Material Editor with lots of different materials.
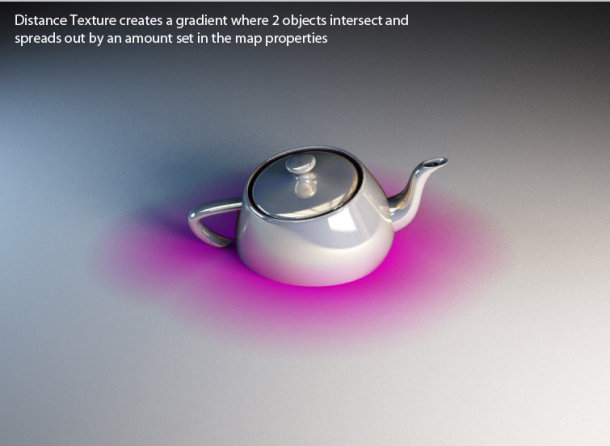
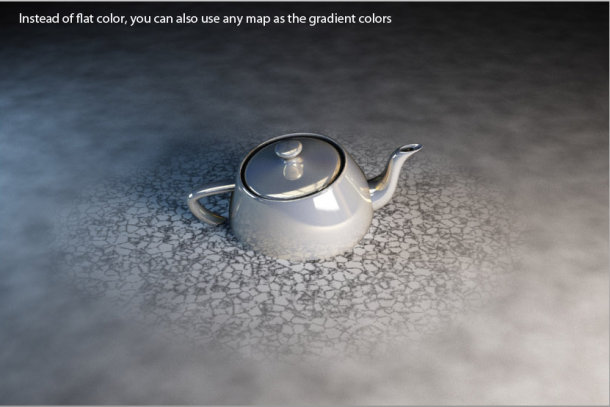
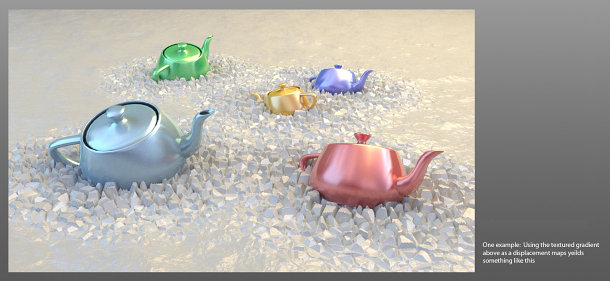
Next up is the VRayDistanceTex texture. This is a procedural texture that blends colors or individual maps based on the distance between two or more objects, the first being the object that the map is applied to, and the others being those specified in the map properties. It has many possible uses, such as creating effects on an object where other objects intersect it, as illustrated below.
In addition to the new maps listed above, the VRayHDRI map has been expanded to include support for tiled OpenEXR files as well as other HDR formats: the new img2tiledexr tool is included for batch conversion of images to tiled EXR files.
Render passes, effects and options
Version 2.0 also includes a number of new render elements. VRayLightSelect is a new render pass that allows you to save out the lighting contribution of a specific light or group of lights into a separate render pass; while VRayDRBucket shows which render node rendered which bucket when distributed rendering is used. This can be very useful for diagnosing a malfunctioning system in a large render farm.
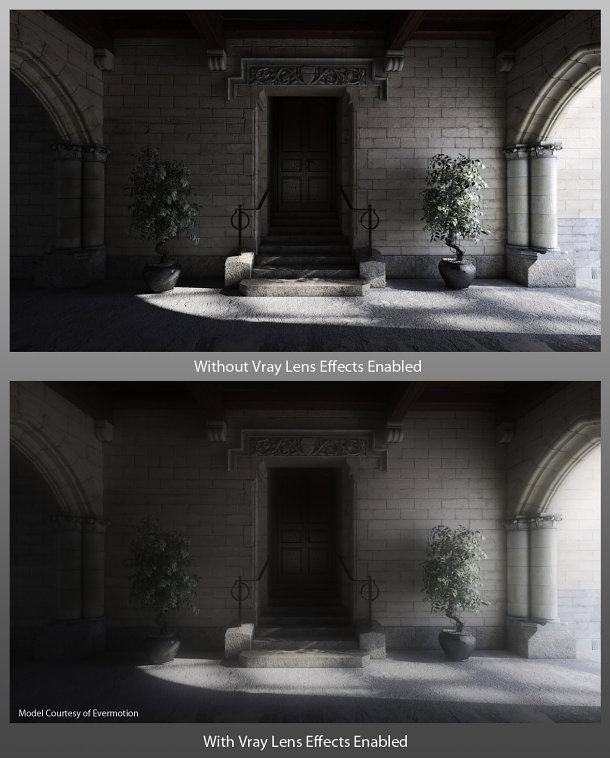
Lastly, there is the new VRayLensEffects render effect. This is basically a highly optimized post effect for creating realistic glows and glare. The effect is highly customizable, and, in my opinion, works quite nicely. However, it probably won’t find much use in production environments as there is no option to save out the result as a separate pass in the Render Elements panel: a curious omission.
In addition to the new render features, VRayEnvironmentFog has been updated. Unlike previous versions of V-Ray, environment fog can now be assigned to multiple gizmos in a scene, instead of just one.
V-Ray 2.0 now includes native support for 3D stereoscopic rendering. This feature alone makes the upgrade worthwhile if you are planning on rendering 3D footage. It is simple to set up – you just add a VRayStereoscopic helper object to the scene – and the settings are easy to use.
There is also the VRayStereoRig controller. Unlike the VRayStereoscopic helper, which creates left and right-eye cameras from a single camera in the scene, this enables you to place two cameras in the scene manually. This can be used where the left and right-eye cameras must be defined separately: for example, when their animation is predefined by motion-capture data.
GPU acceleration: a disclaimer
The other big news is that Chaos Group’s interactive preview renderer, V-Ray RT, now ships as part of V-Ray 2.0, where previously they were marketed as separate products. At the time of writing, I haven’t been able to get V-Ray RT to work on my test system – which is curious, since V-Ray 2.0 itself is stable, and works flawlessly – so this part of the article is based on the software specifications, and demos of RT I have witnessed.
V-Ray RT offers a fast, near-production quality preview in Max’s ActiveShade window in order to provide rapid feedback when fine-tuning a scene before sending it off for final beauty rendering. It supports most of V-Ray’s render features, and will use both the host system’s CPUs and any available GPUs. This greatly enhances performance and offers near-real-time feedback similar to that provided by other GPU-accelerated renderers like iray and Arion.
However, V-Ray RT has something going for it that iray and Arion don’t: OpenCL support. While Nvidia’s CUDA architecture, used in other GPU-accelerated renderers, is a strong foundation to build on, it has the limitation of only running on Nvidia hardware. Nvidia GPUs are powerful, but users like to have choices, and since OpenCL is supported by both Nvidia and AMD, V-Ray RT can be used with GPUs from either manufacturer.
V-Ray has consistently proven itself a high-quality, feature-rich application, and one that has demonstrated that it can run with the big boys through its use in high-profile movie projects.
The new feature set with version 2.0 is extensive, and all of the new features are actually useful: by no means a given in other applications. Throw in stereo rendering and (despite my test system’s issues with it) the V-Ray RT preview renderer and you have an all-inclusive package.
While it would have been nice to see more substantial performance increases in version 2.0, V-Ray is still on a par with other renderers that use similar underlying technologies when it comes to raw speed. Overall, V-Ray 2.0 is another winning release, and one that is sure to satisfy even the most hardcore rendering enthusiast.
With thanks to
I would like to give an special thanks to the following people and organizations who contributed resources to help in the completion of this review:
Darina Georgieva and Maria Padalski of Chaos Group


